AI Assistant
Overview
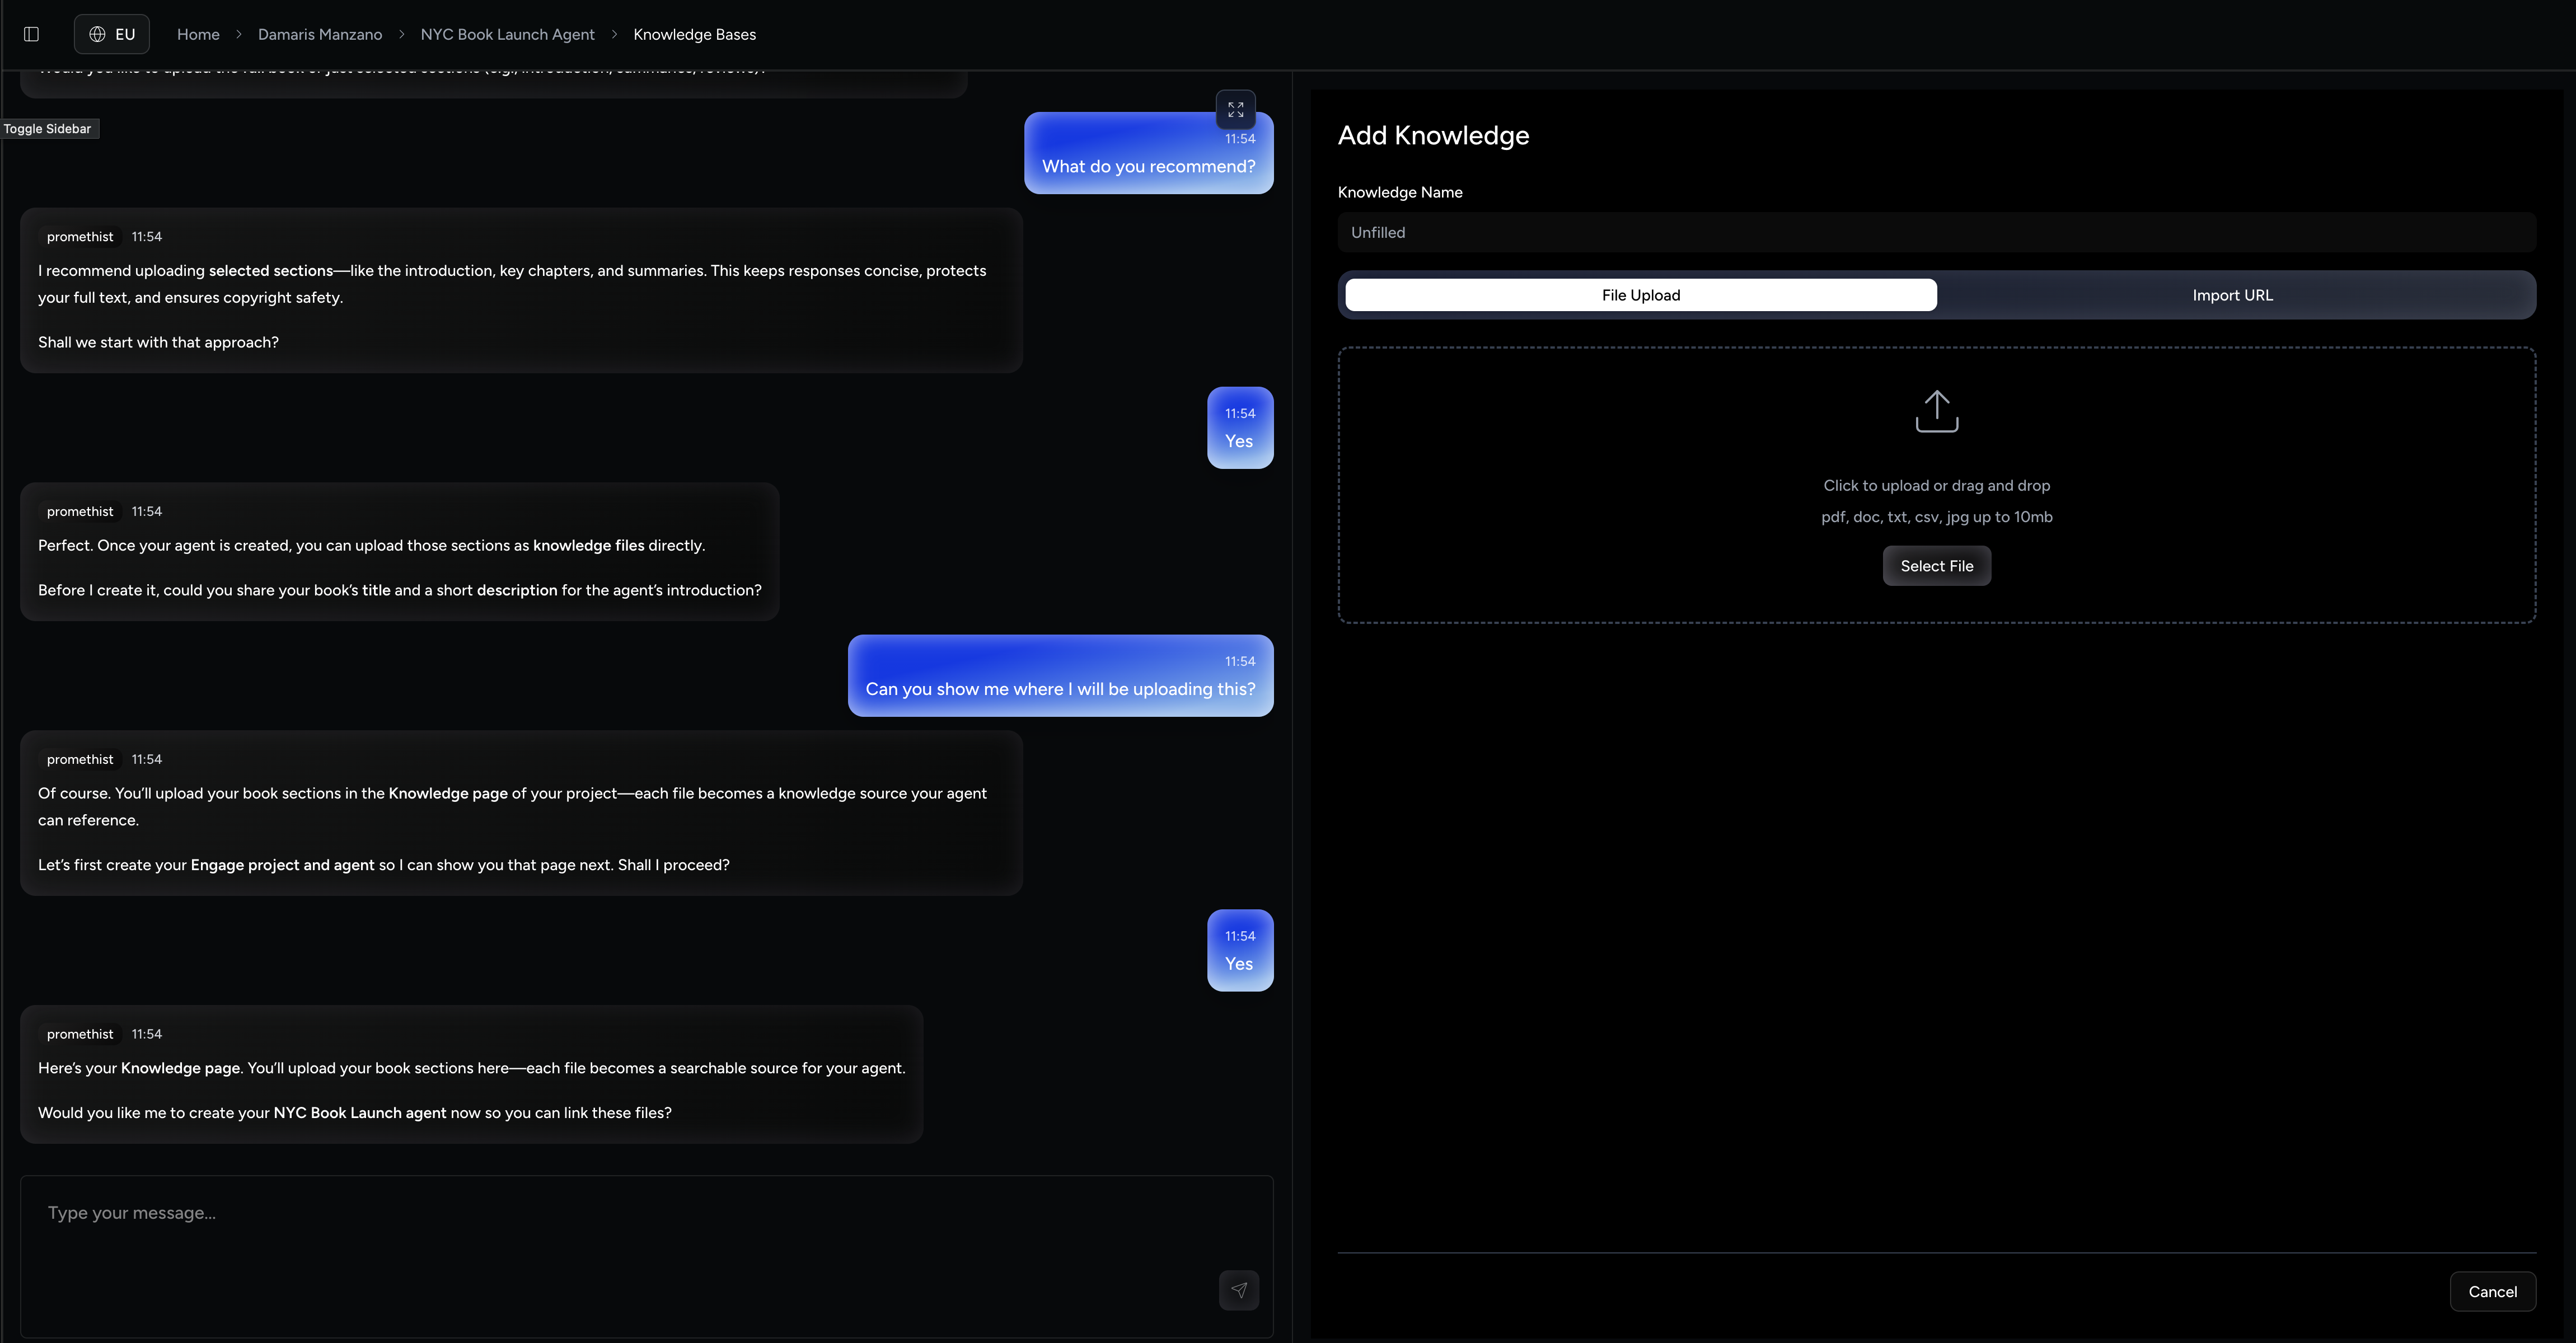
AI Assistant provides a faster way to interact with the PromethistAI Platform. Instead of navigating through Studio in a traditional way, you can create agents, configure settings, and move between platform sections through natural language using chat.
Getting Started
To switch to AI Assistant, click the toggle in the platform bottom left corner. Once in AI Assistant, you can:
-
Create and configure agents by describing what you want to build
-
Navigate to specific platform sections by asking
-
Make targeted configuration changes through conversation
-
Get guidance on platform features and capabilities
Switch back to Studio at any time for detailed control and administrative tasks.
How AI Assistant Works
AI Assistant displays a chat interface on the left side of your screen. As you work together, Studio sections open on the right side and these are fully interactive. You can:
-
Continue your conversation with AI Assistant on the left
-
Work directly in the Studio interface on the right
-
Click, edit, and configure settings as you normally would
The chat and Studio interface work together. While you’re talking with AI Assistant, you can also interact with whatever section is open on the right.
What AI Assistant Does Well
Rapid Agent Creation
Build initial agent configurations quickly by describing your use case:
-
"Create a customer support agent for our e-commerce platform"
-
"I need an onboarding agent that guides new employees through their first week"
Current Limitations
While AI Assistant is powerful for creation and exploration, some tasks are better using Studio:
Best for Guided Changes, Not Autonomous Updates
AI Assistant helps you make changes quickly, but keep an eye on what the changes are. Don’t trust it to handle multiple updates on its own. For bigger changes, use AI Assistant to navigate where you need to go, then make the adjustments yourself by editing or switching to Studio.
Asset Management Restrictions
-
Cannot delete or move assets
-
No access to delete functions
-
Cannot upload documents directly in the chat interface
Best Practices
-
Start in AI Assistant for new projects – describe what you want to build and let the platform guide you
-
Switch to Studio for refinement – use precise controls for detailed configuration
-
Use AI Assistant as a navigator – let it take you directly to the sections you need
-
Review changes as you go – don’t make multiple changes without checking results
-
Leverage both modes together – they’re designed to complement each other’s strengths
|
Think of AI Assistant as your collaborative assistant for exploration and getting started quickly, while Studio is your precision tool for detailed work and administration. |
Switching Between Modes
You can toggle between AI Assistant and Studio at any time using the mode switcher in the bottom left part of the platform. Your work is preserved when switching – you won’t lose progress or unsaved changes.
When AI Assistant needs you to complete an action in Studio (like sending an invitation or accessing full billing controls), it will automatically open the appropriate section for you.